Frequently Asked Questions

-
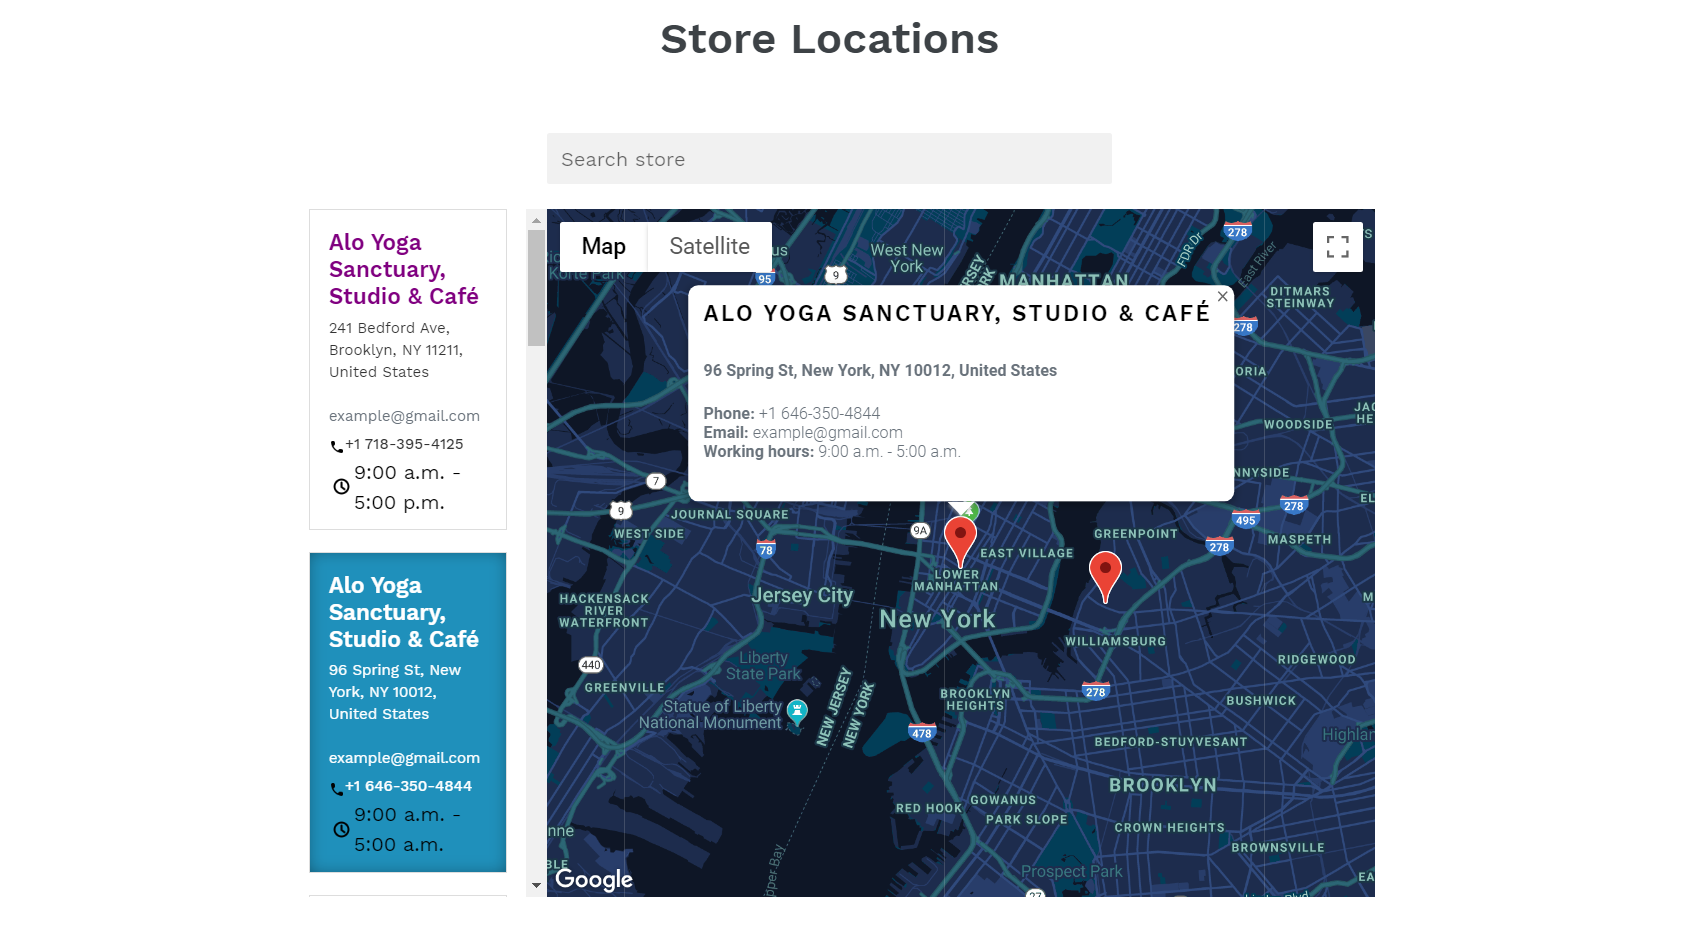
1. What does this app do?It will help you create a beautiful list showing all of your offline stores. You have the ability to add, edit, and remove stores. You also have full control over the design on the page, which will display all your offline stores.
-
2. Are there any additional steps that I should do after I install the app?There is just one additional step - you have to add the store listing page to your front store. You can add it on the navigation menu, in the footer or on any page that you want. You can see the link of the page from "Dashboard" -> "View Page".
If you want to add the page in one of your navigation menus, you have to go to "Online Store" and then "Navigation". Check this video for more details.
Adding a link to a specific page depends on the theme that you are using. If you need help with any of this, do not hesitate to contact us - our team will be more than happy to help you.
That's all! After this, you can directly start by creating a store.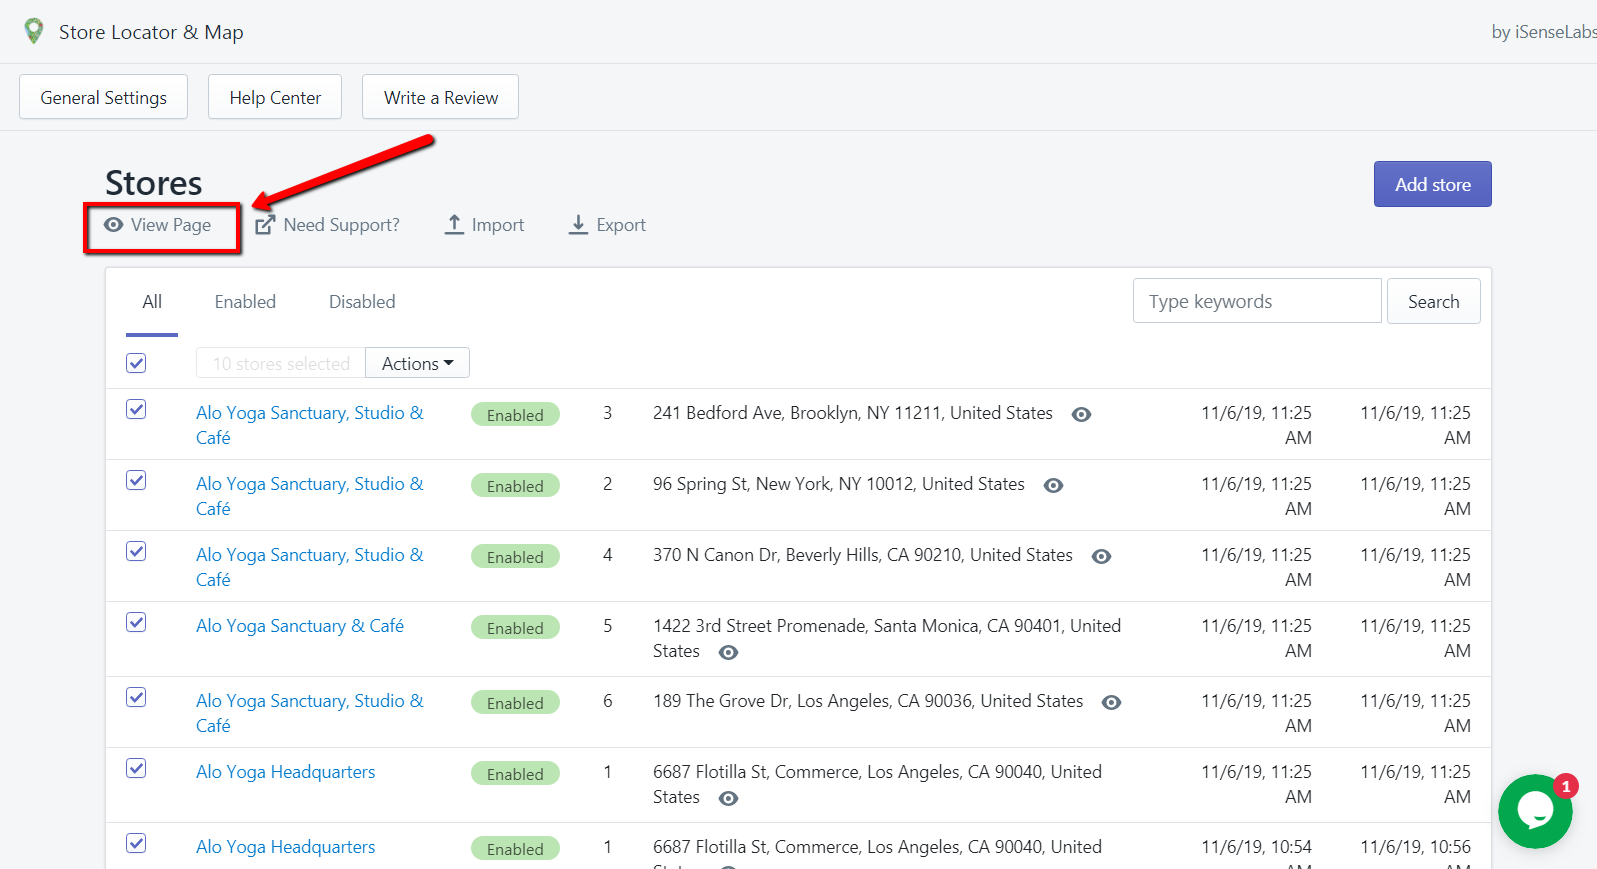
-
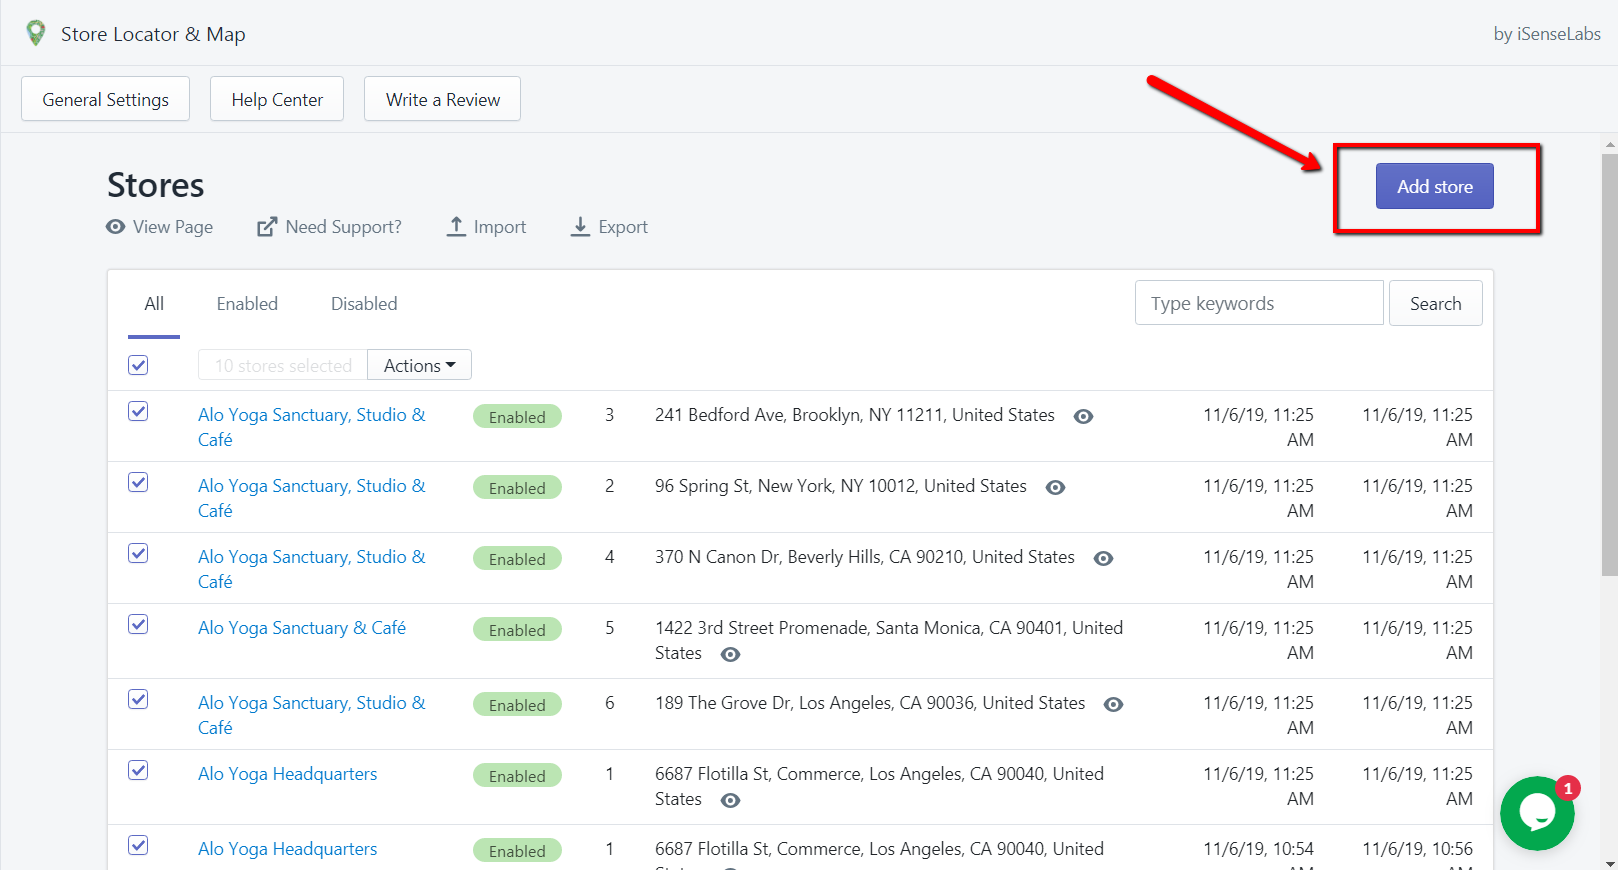
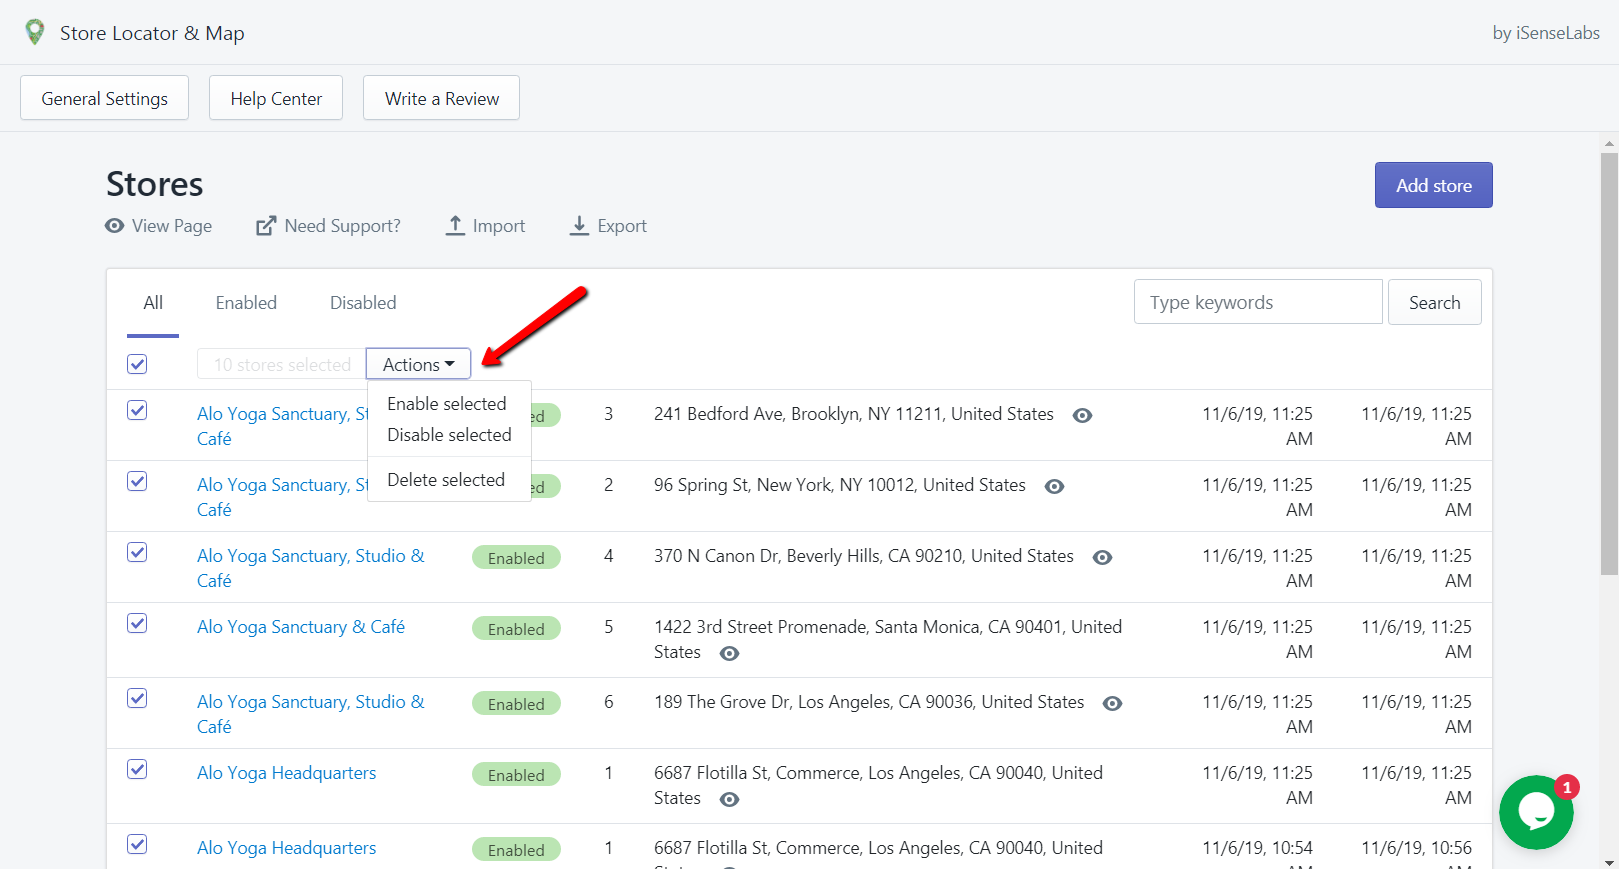
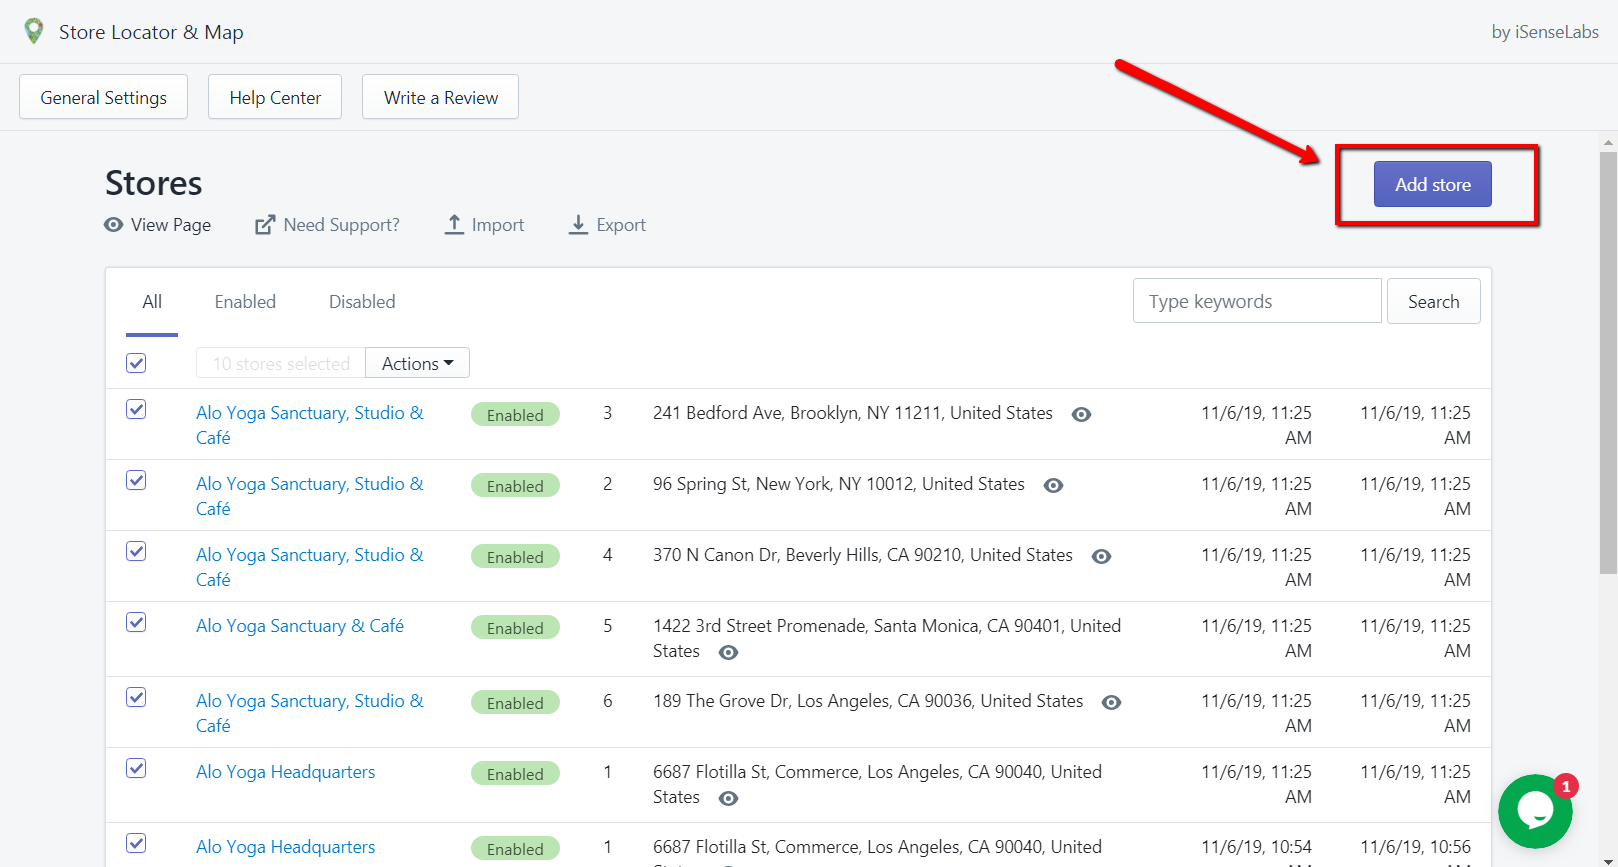
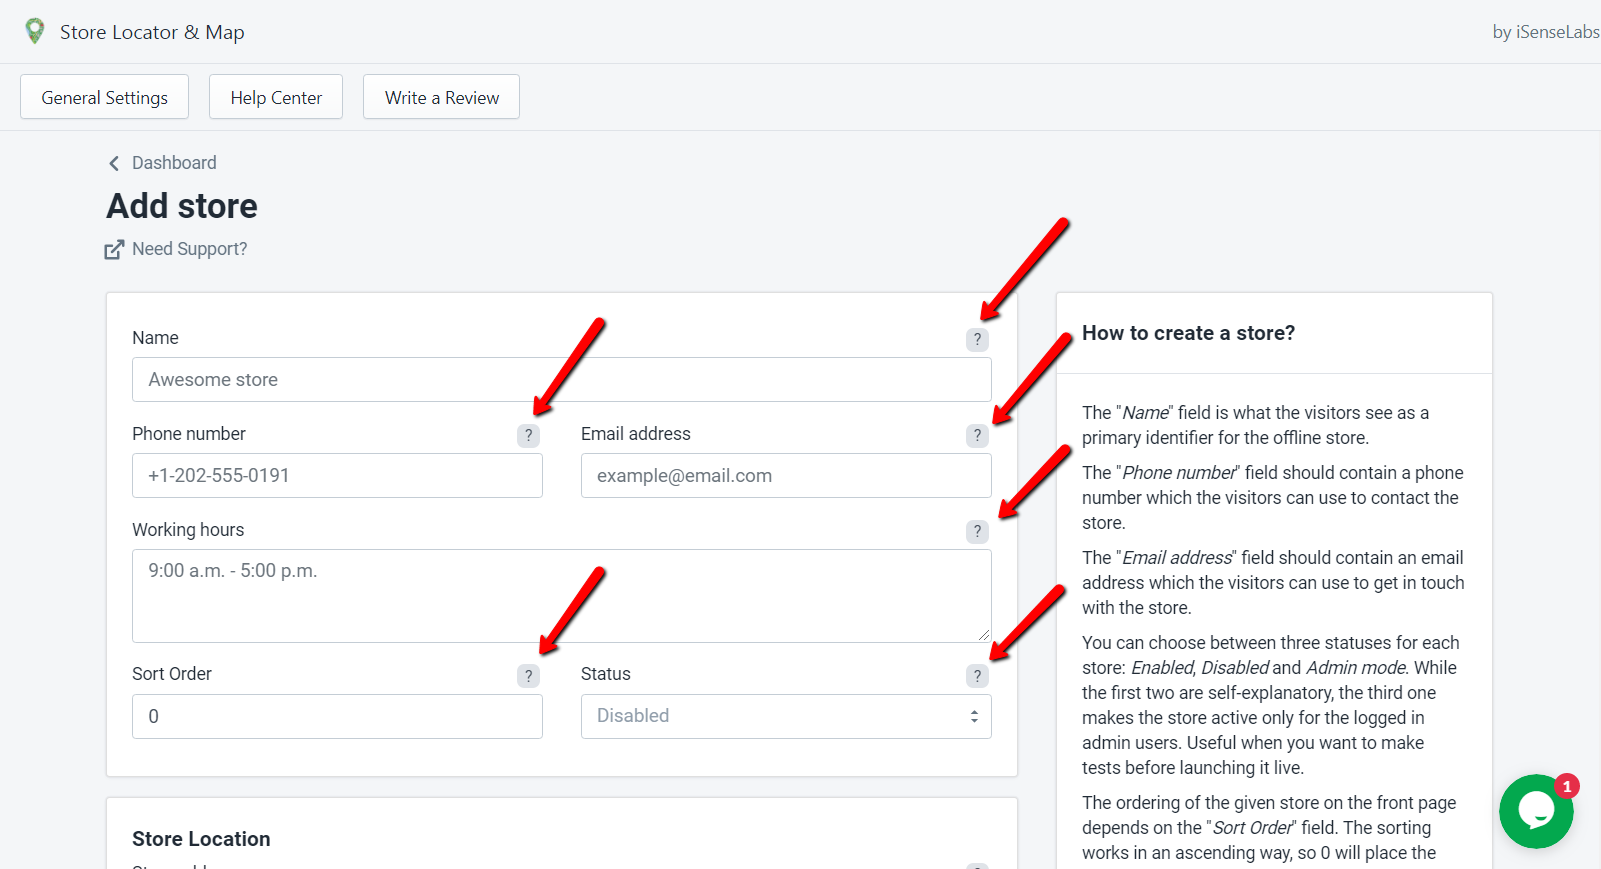
3. How to create a store?You have to navigate to the "Dashboard" and then click on the "Add store" button. A page will be displayed, where you will find detailed instructions for each field. There are small question icons near each input, which will give you more information on it.

-
4. How many stores can I create?You can add an unlimited number of stores. Currently, there are no limitations to that.
-
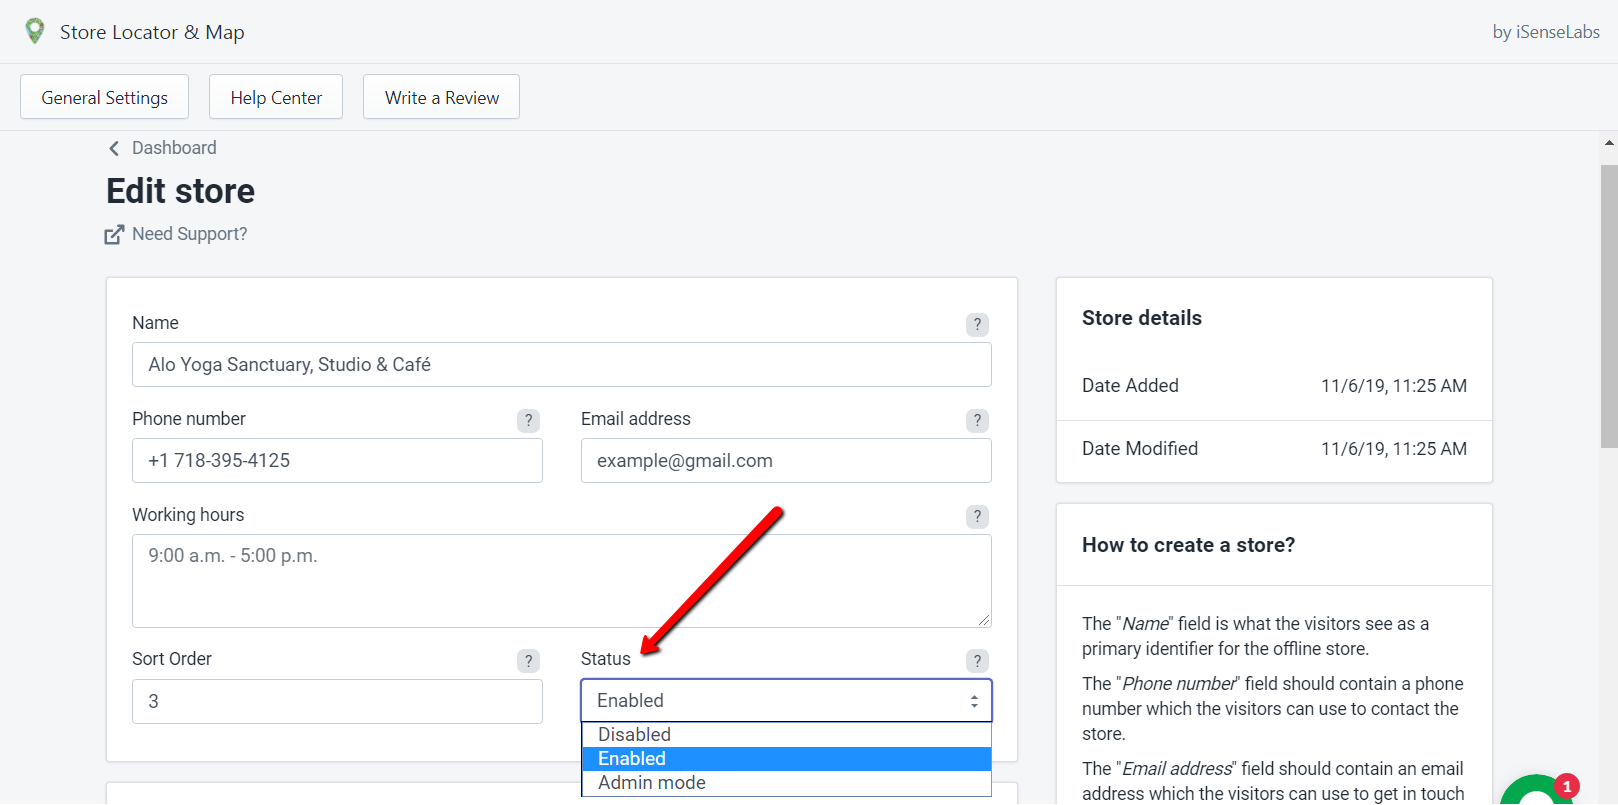
5. How can I make tests with my store?Each store has a status. It can be "Enabled", "Disabled" or "Admin mode". When a store is set to "Admin mode", it means that the store is available only for admin users to see.
-
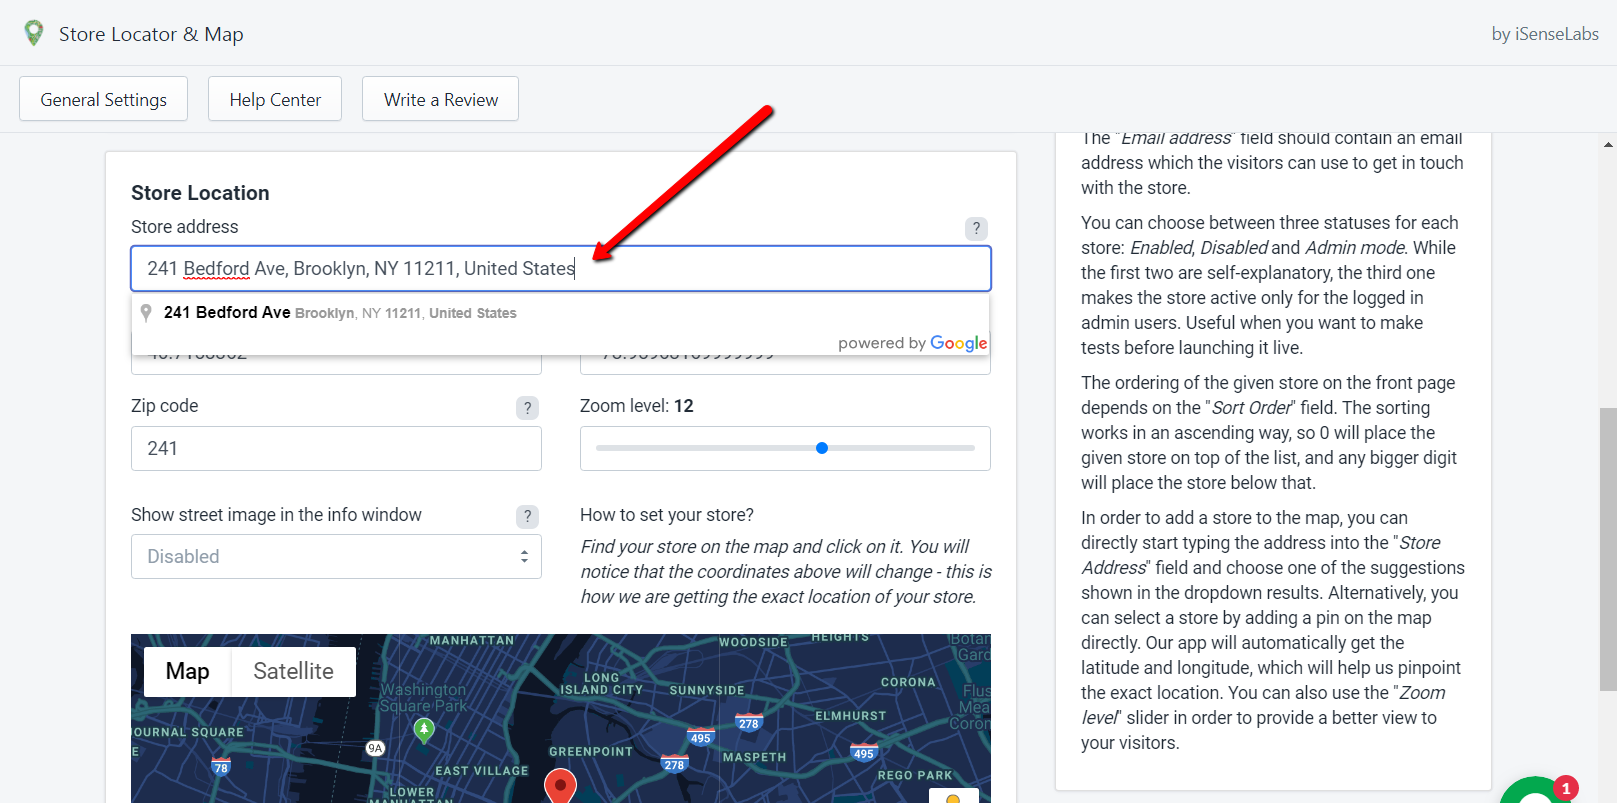
6. How to add the address of the store?You can type the address in the field "Store address" and the module will automatically capture the "Latitude" and "Longitude" of the location and autofill the maps field. In addition to that, you can simply find your store on the map and add a pin to it. Our app will automatically pinpoint the exact location.
-
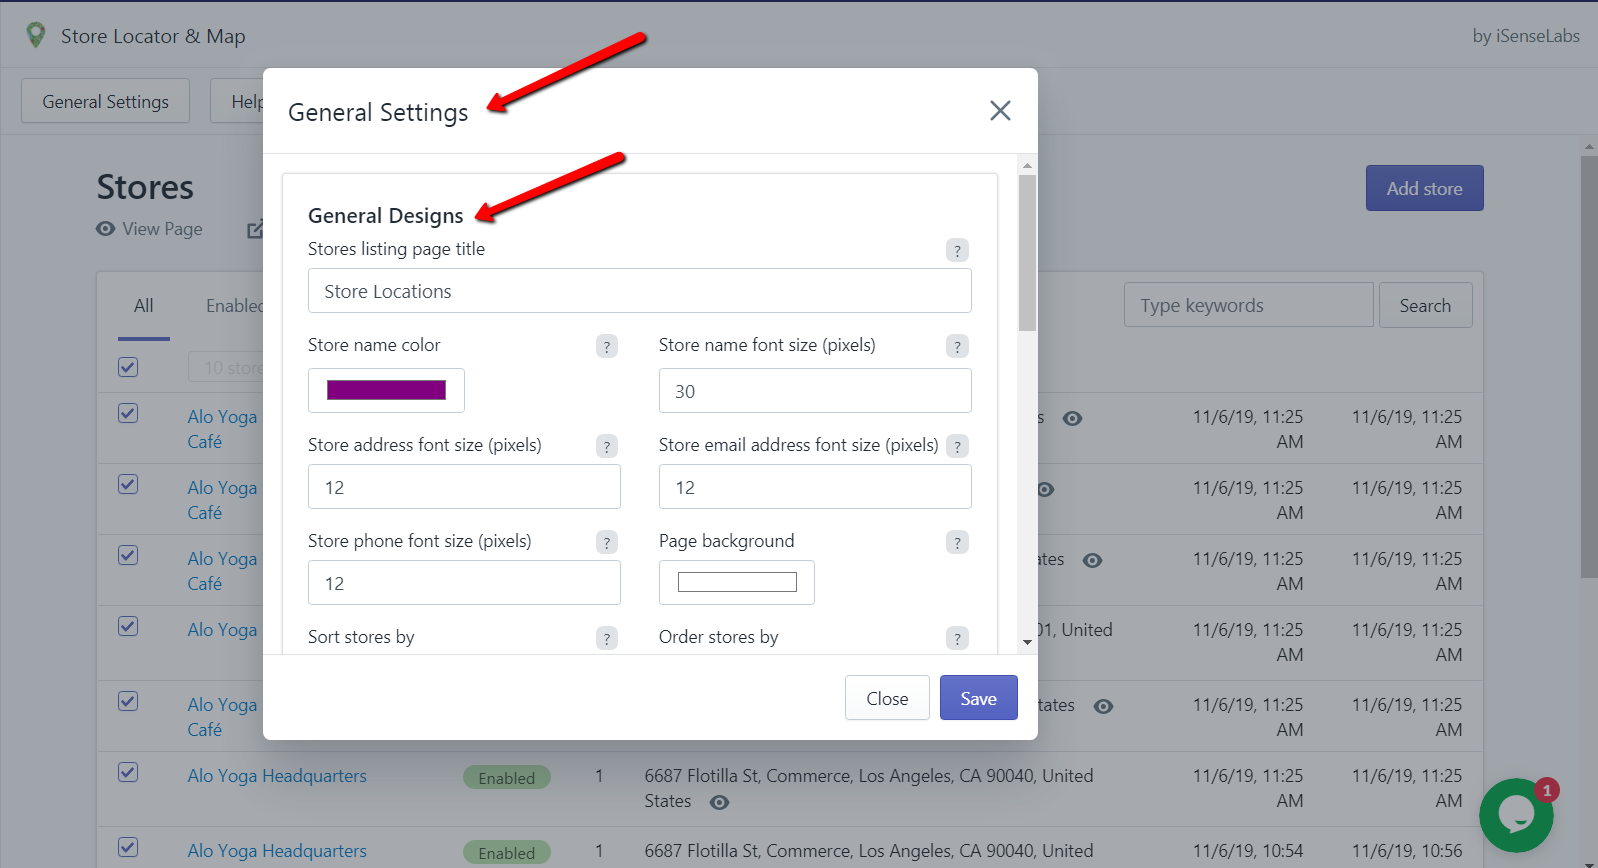
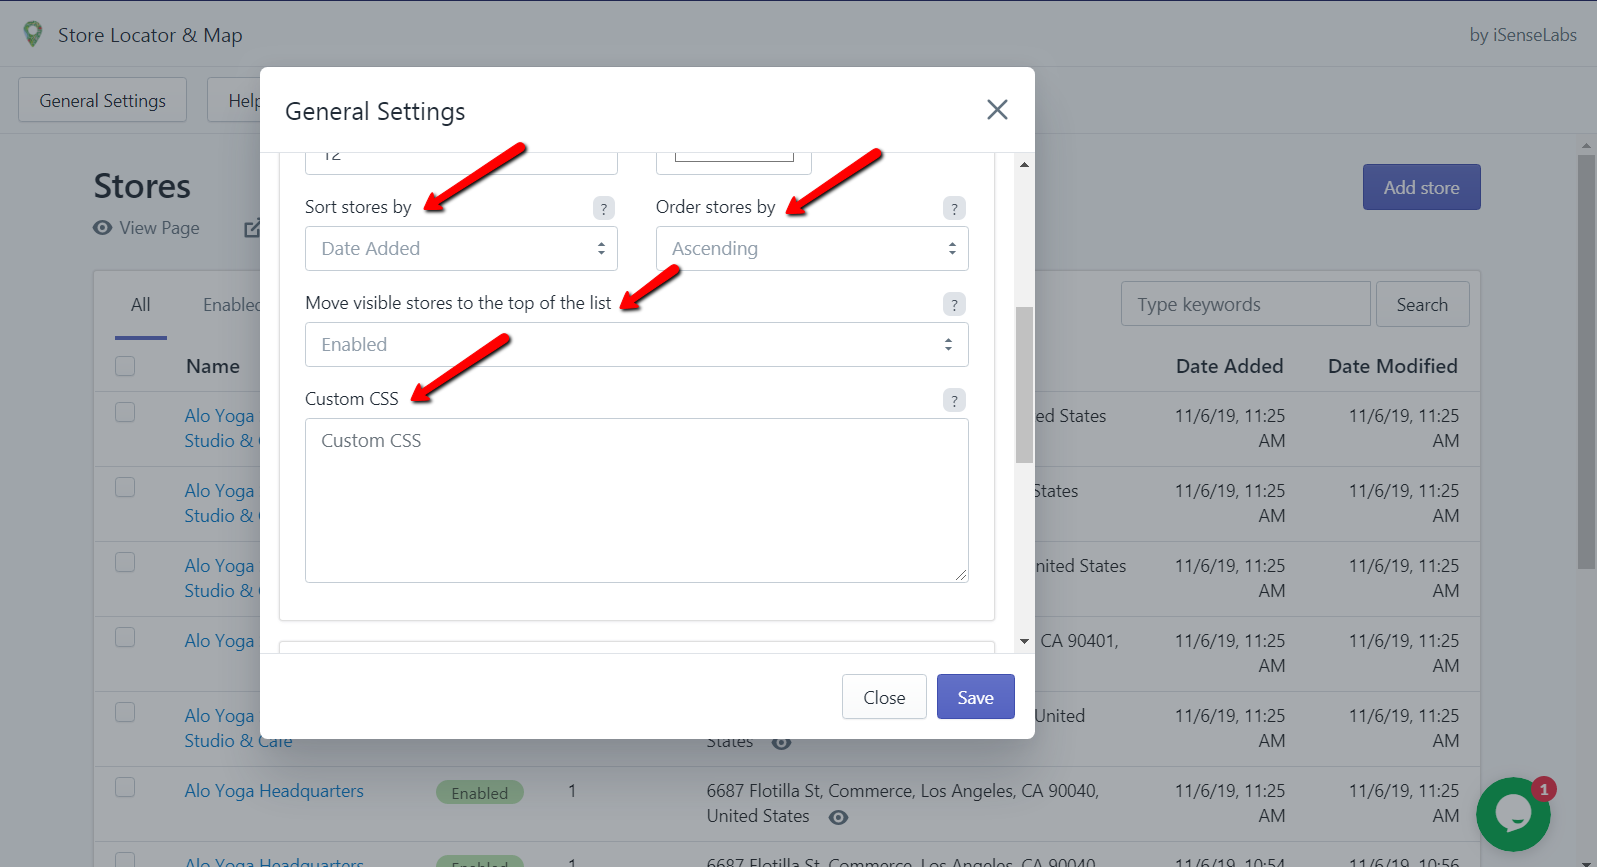
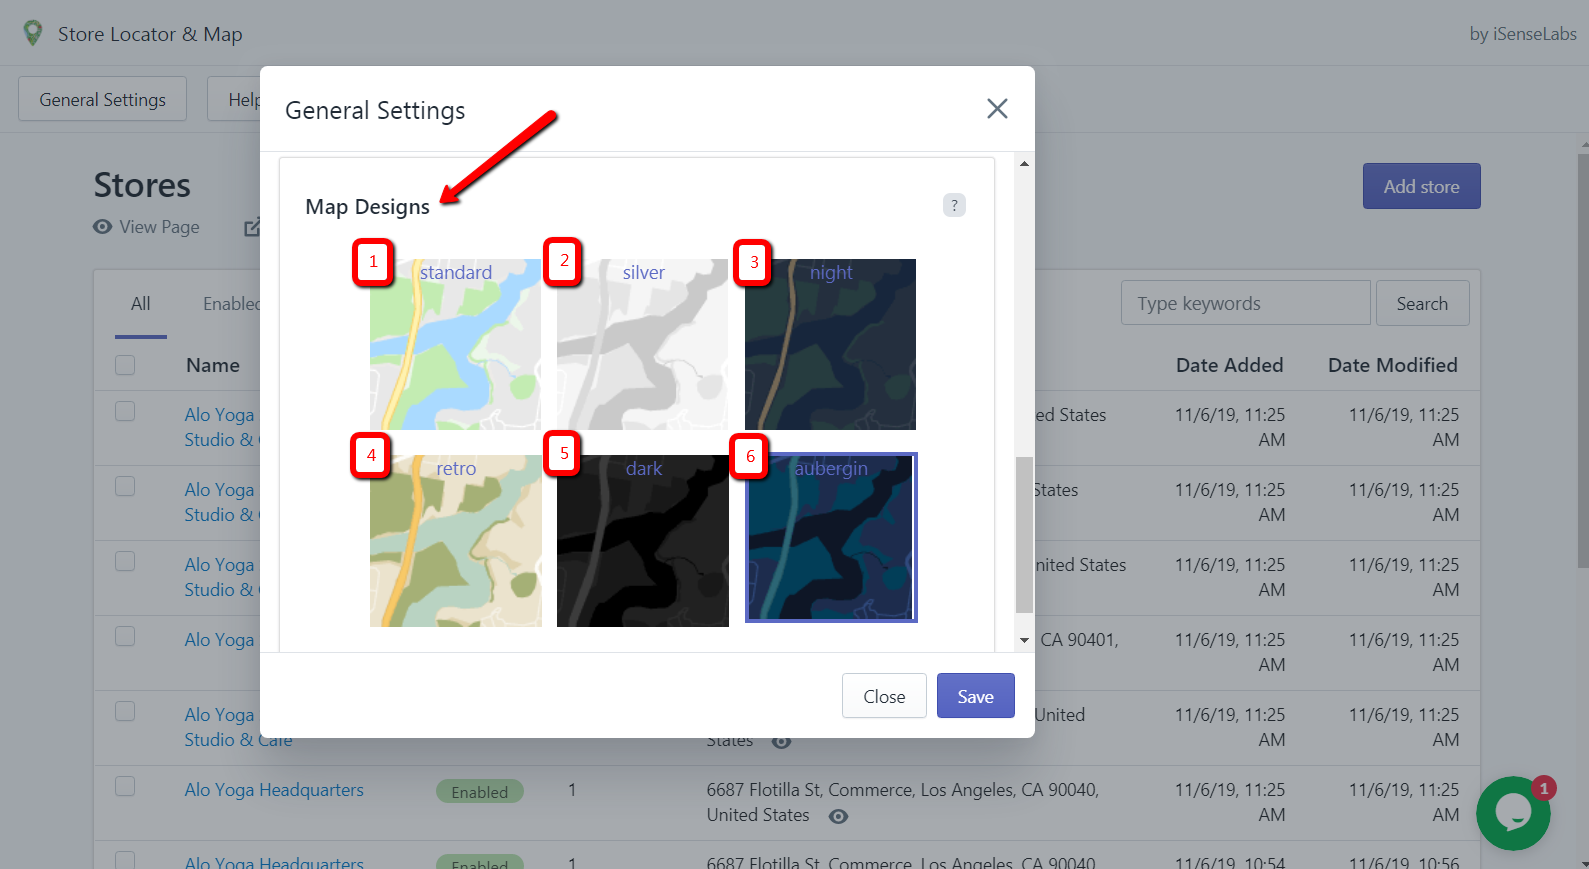
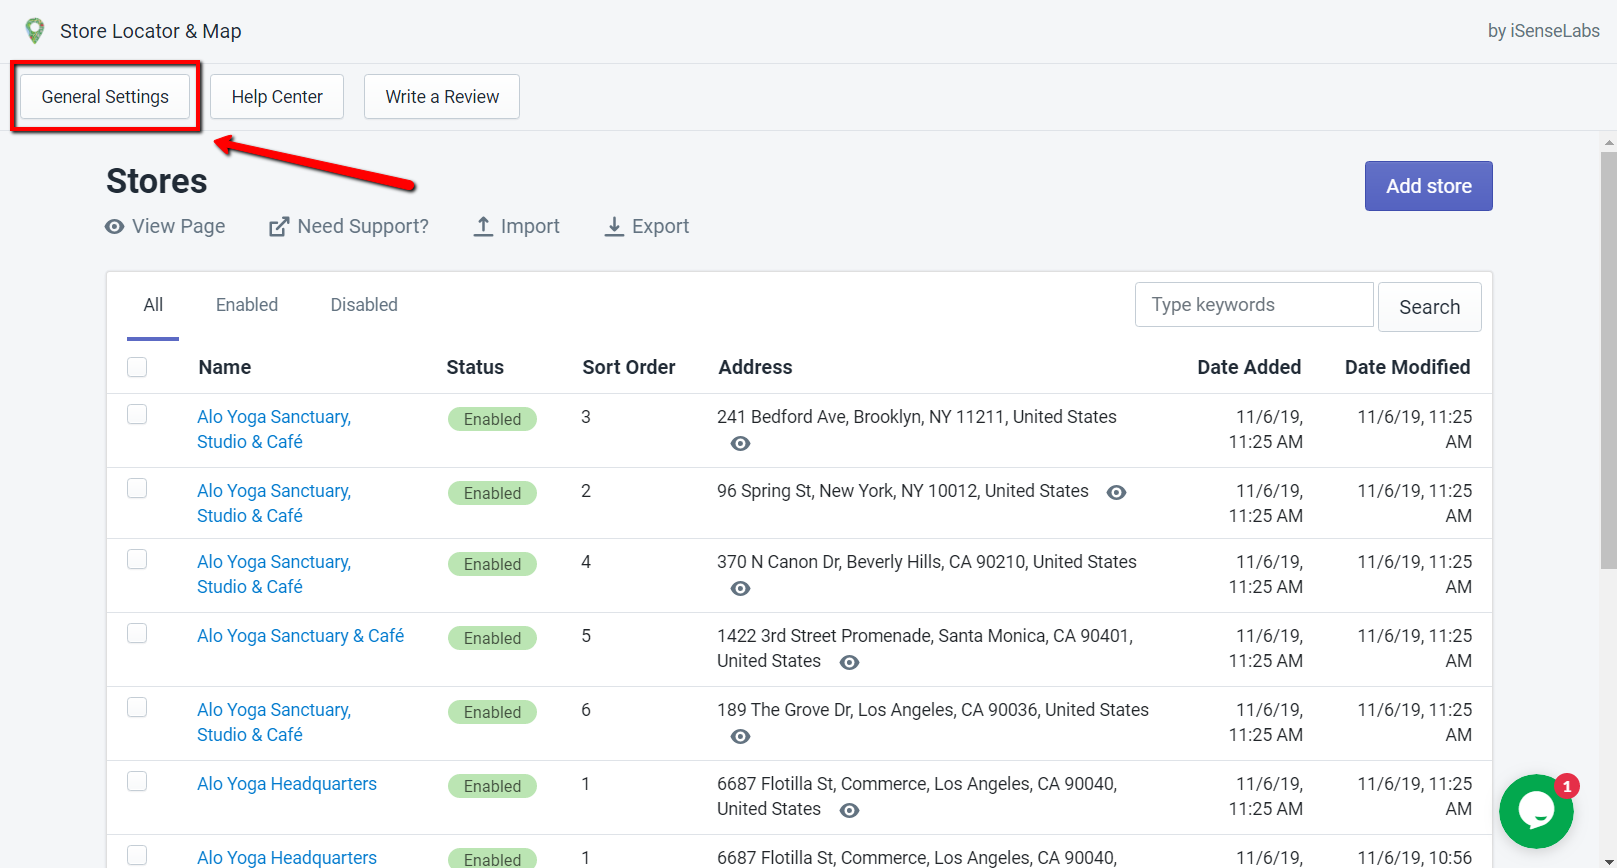
7. How to edit the store listing page?You can edit the settings for the stores listing by clicking on the "General Settings" button, shown in the upper-left side on every page. You can edit the styles of the text (font, color, and size), change the page title, and choose between six different map designs.
Note that it might take some time to update the information on the page. Usually, it should be no more than a minute.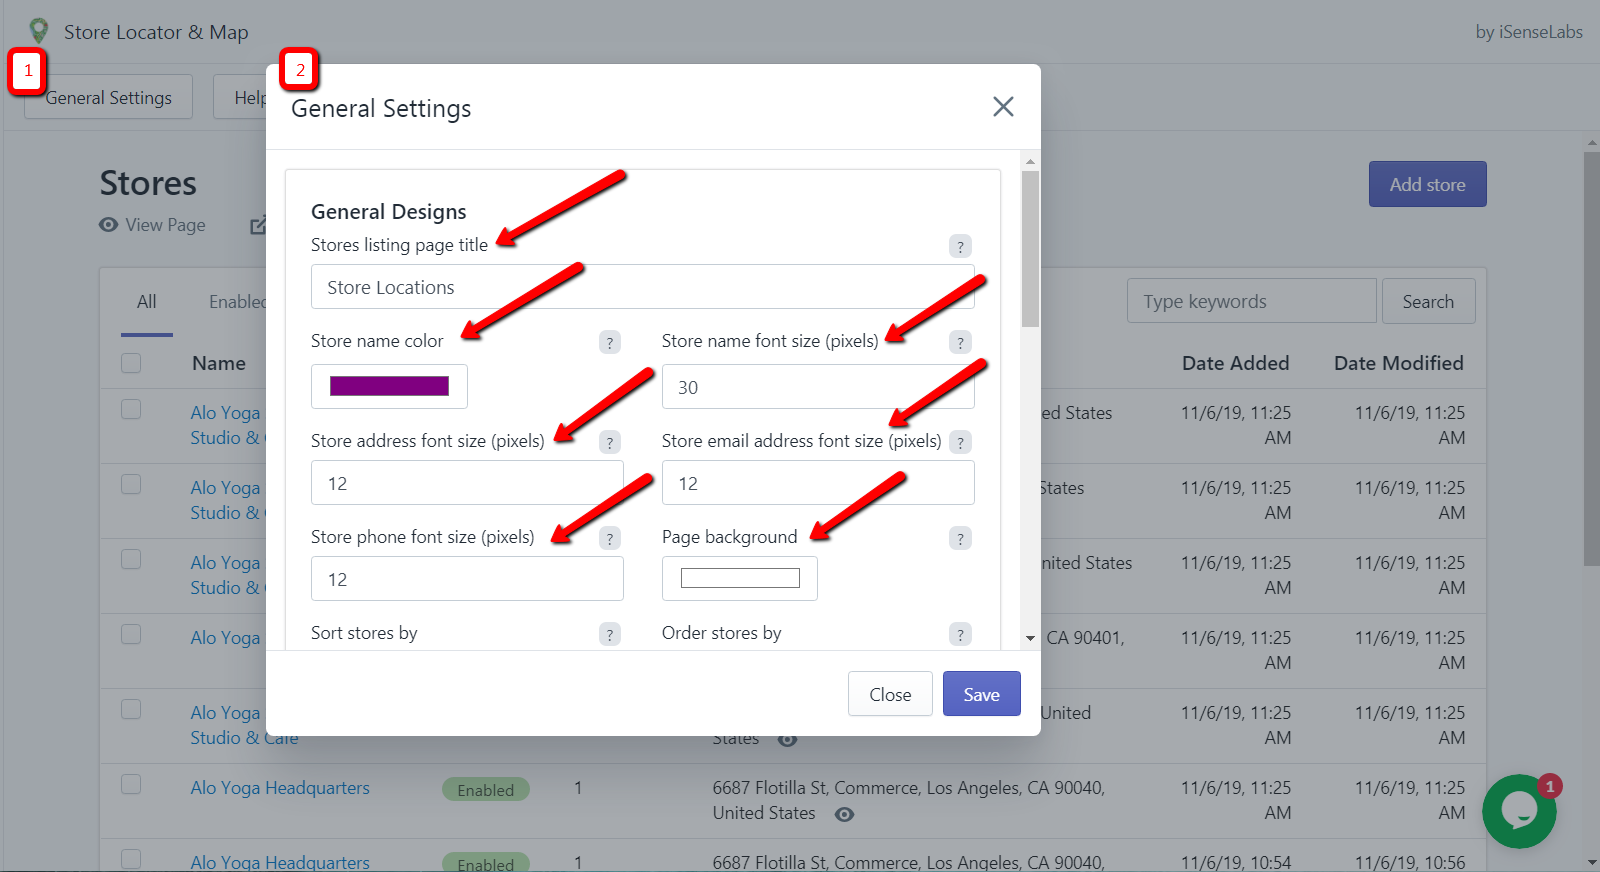
-
8. I have a feedback/suggestion for the appGreat! We would love to hear what you want to say. You can contact us directly from the "Message Us" button at the bottom right corner of your browser or at apps-support@isenselabs.com.
-
9. I don't see my question here. How can I contact you?You can contact us directly from the "Message Us" button at the bottom right corner of your browser or at apps-support@isenselabs.com.
-
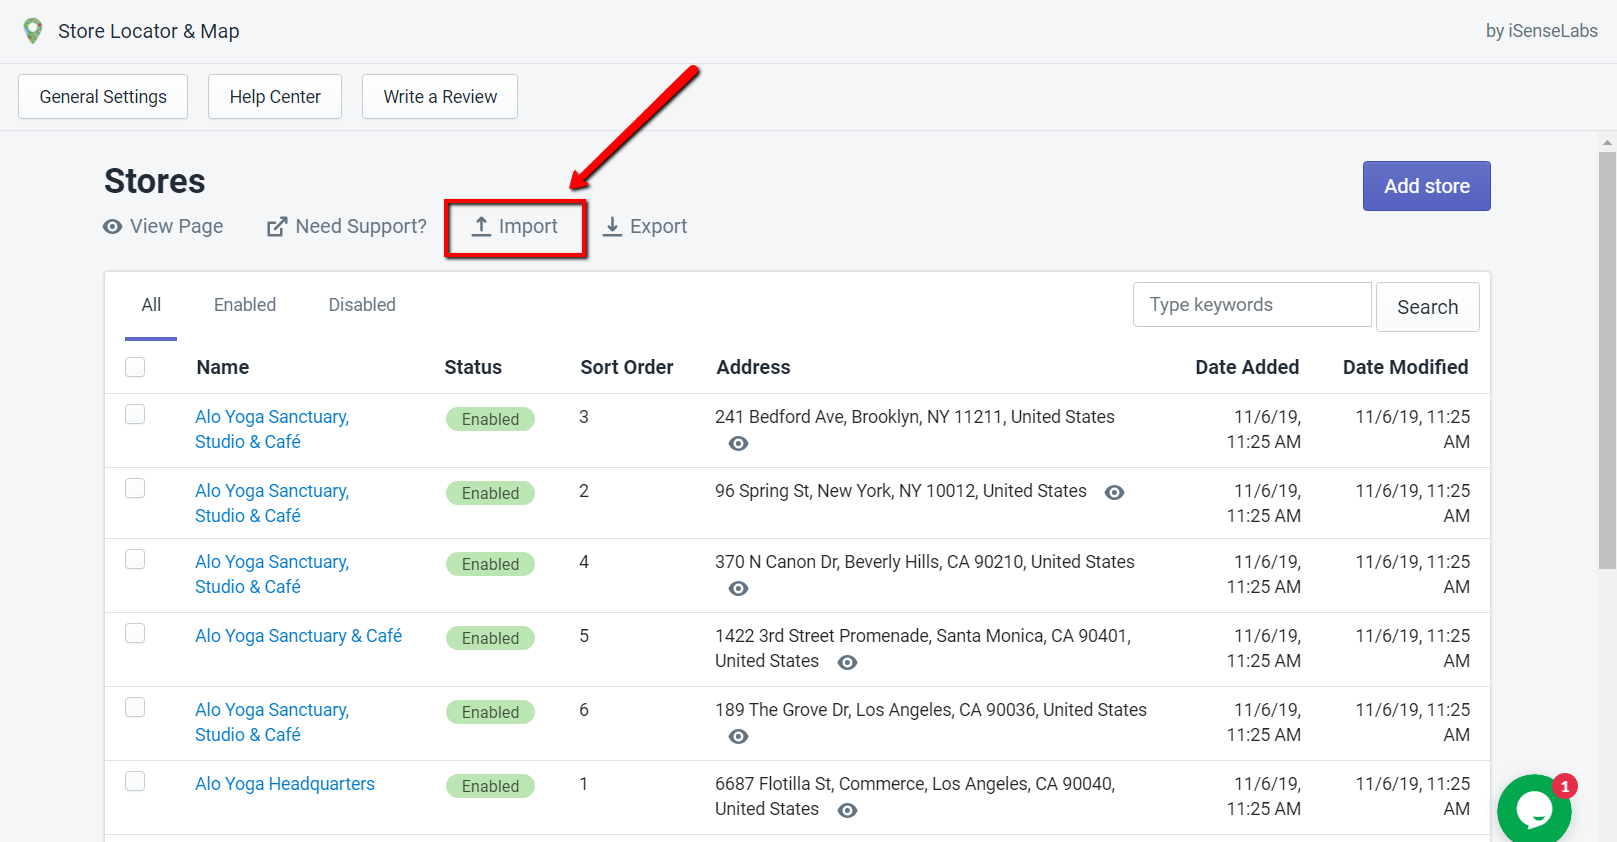
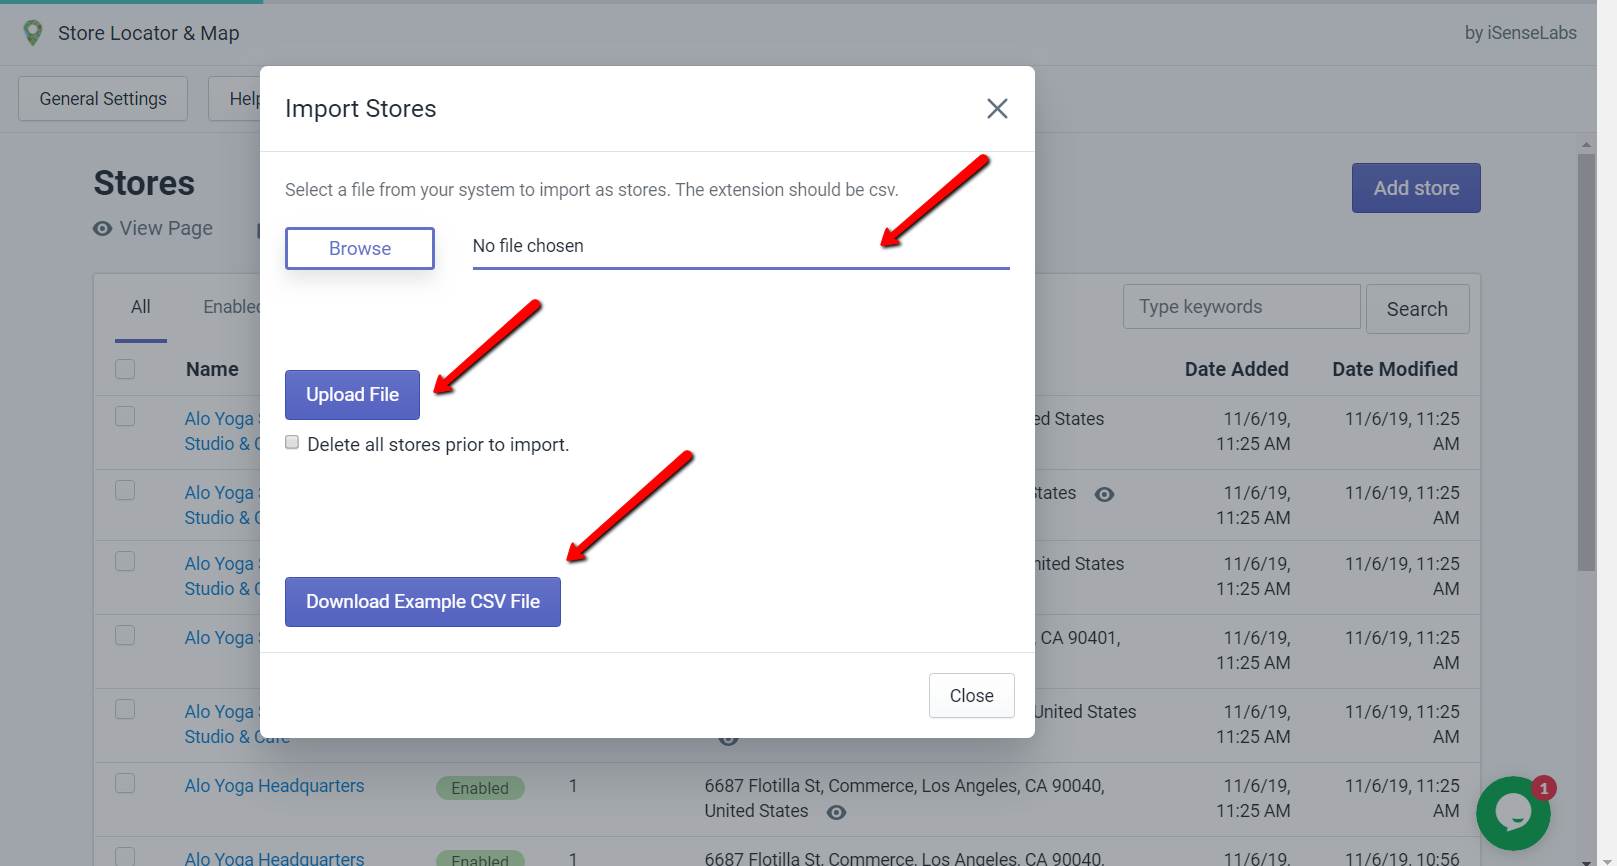
10. I have a list of stores. Can I import them in bulk?Yes, you can use the Import function to do that. Keep in mind that it only works with.csv format files. For your convenience, we have uploaded an example .csv which you can download in order to get familiar with the specific format.
-
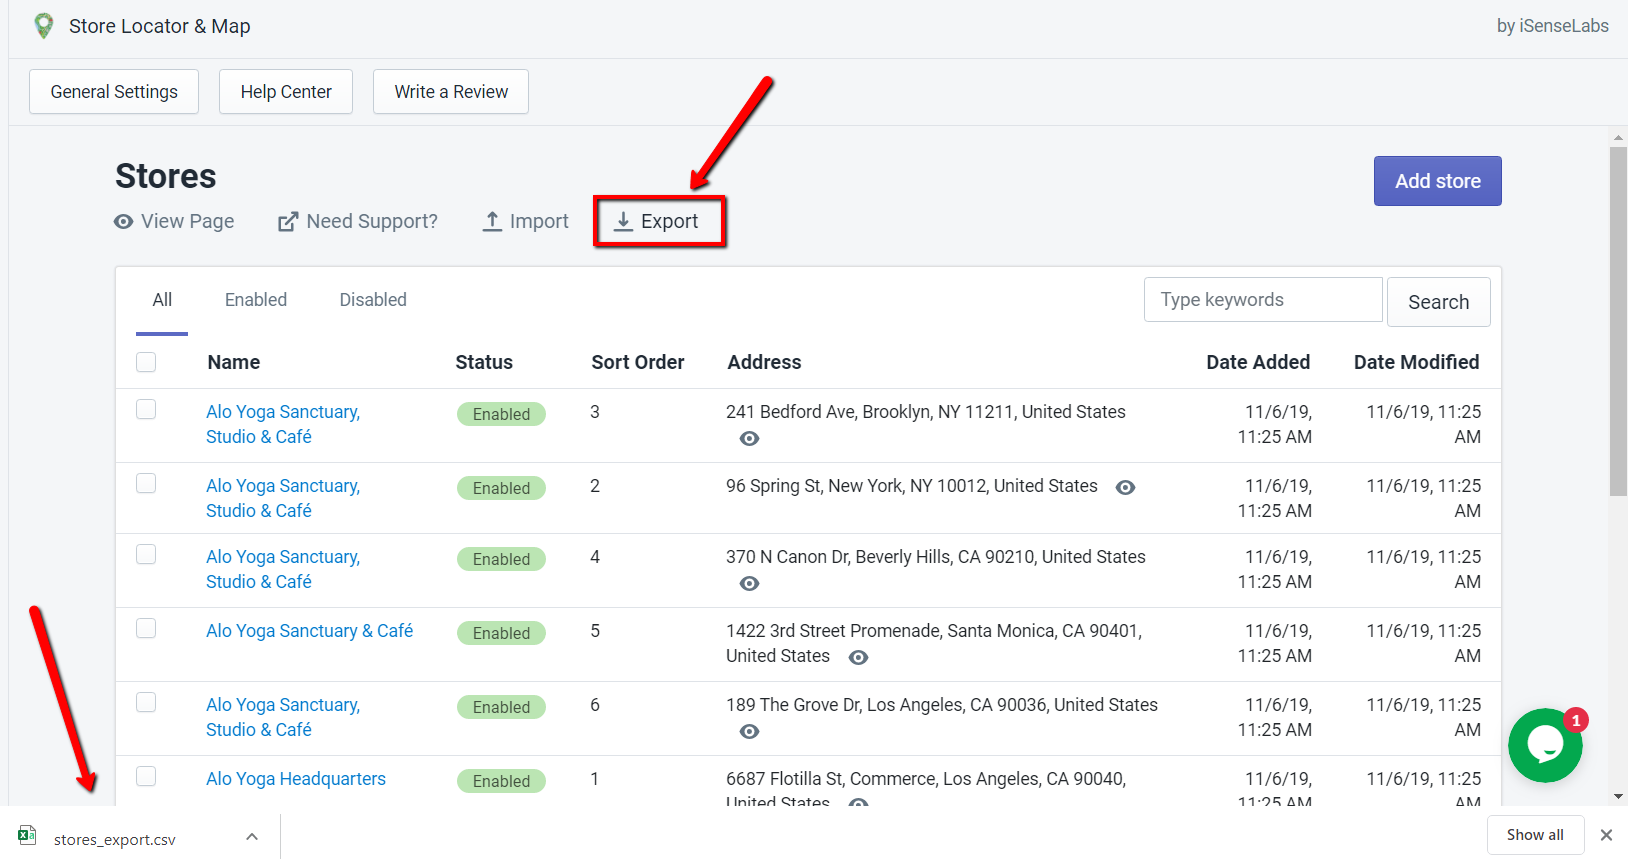
11. Can I make an export all my stores into a file?Yes, you simply need to click on the Export button and a .csv file with all of the stores and store info will be downloaded on your side.
-
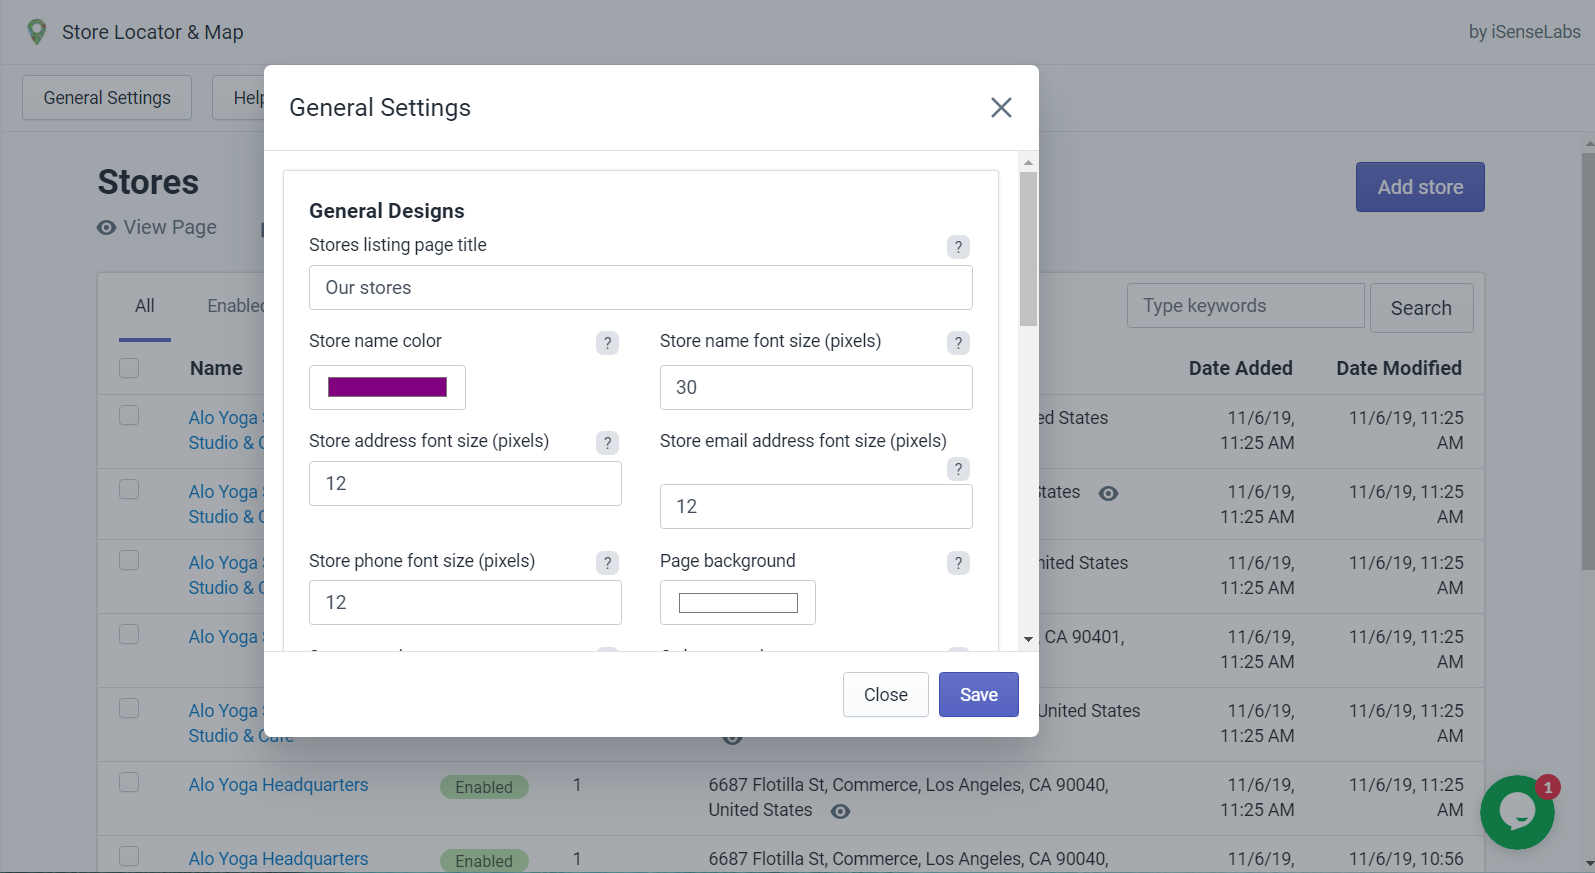
12. Where can I modify the general design of the Store Locator Page?You can modify the Store Locator page by clicking on the General Settings button. Once clicked you will get a popup containing all General Designs options that you can alter.
-
13. How to add a description on the Stores Listing page?First, you will need to click on the General Settings button on the admin side of the app and look for the Stores listing page description field located right under the Stores listing page title field.

Input your text here and save the settings. After this go to the Store Listing page of your website and see how the text is going to look like.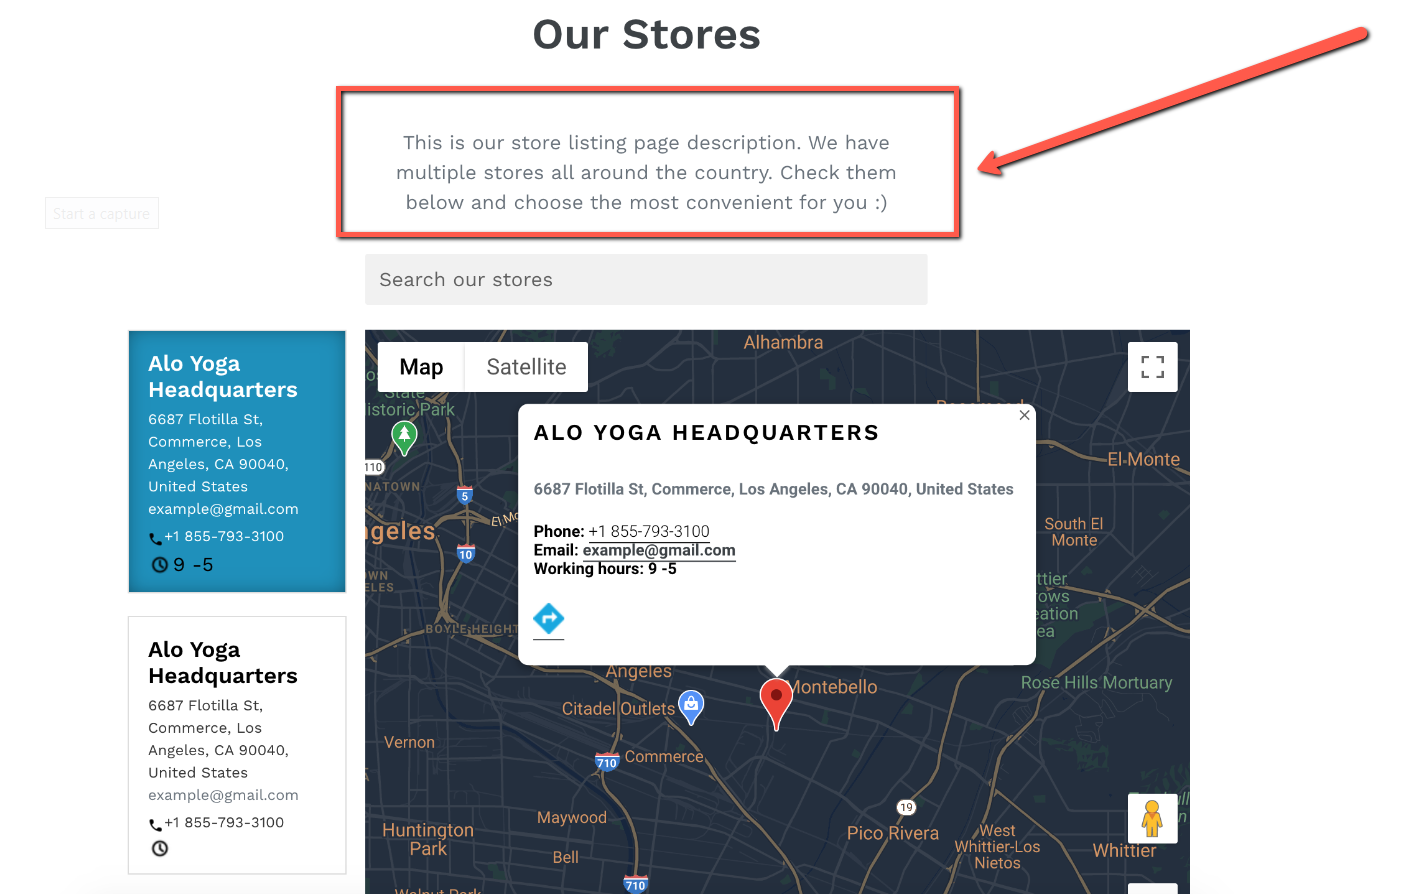
-
14. How to add a custom image for each store?You now have the option to add a unique image to each different store location right from the Edit store page of the app:
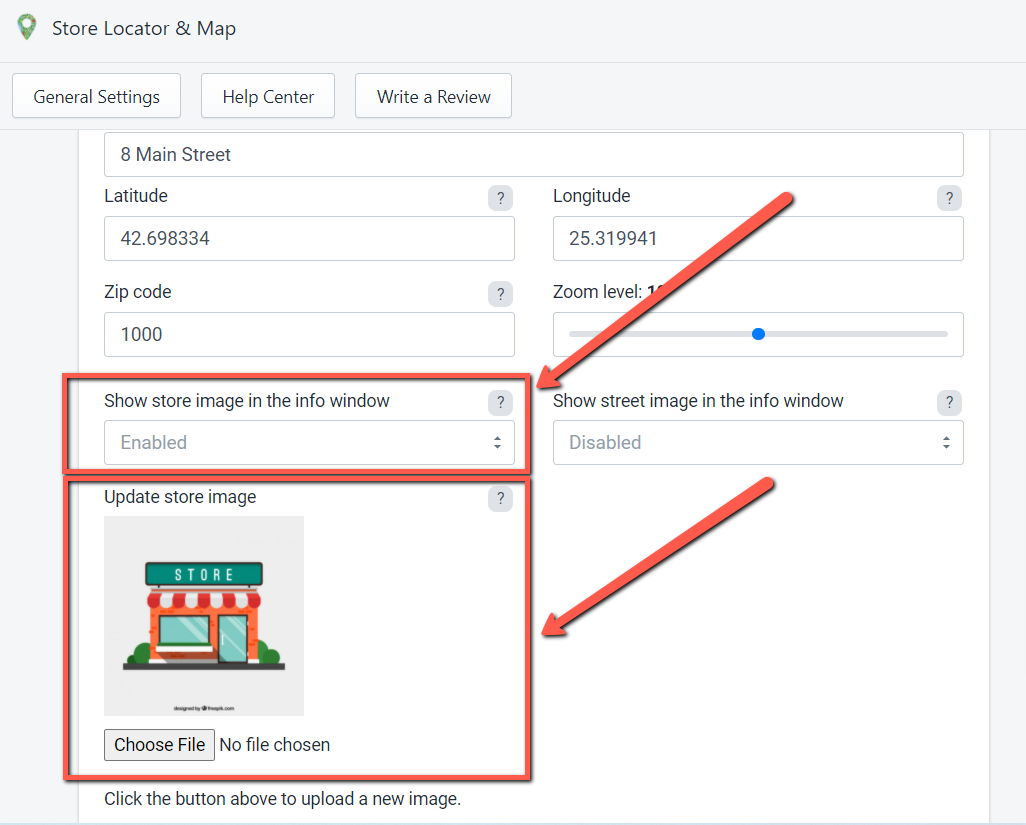
As you can see from the screenshot you will need to upload the image and make sure that the option for Show store image in the info window is set to Enabled, so you could see the image in the Stores listing page like this:
Note: In order to show the store image you have uploaded, you will need to have the Show street image in the info window option Disabled.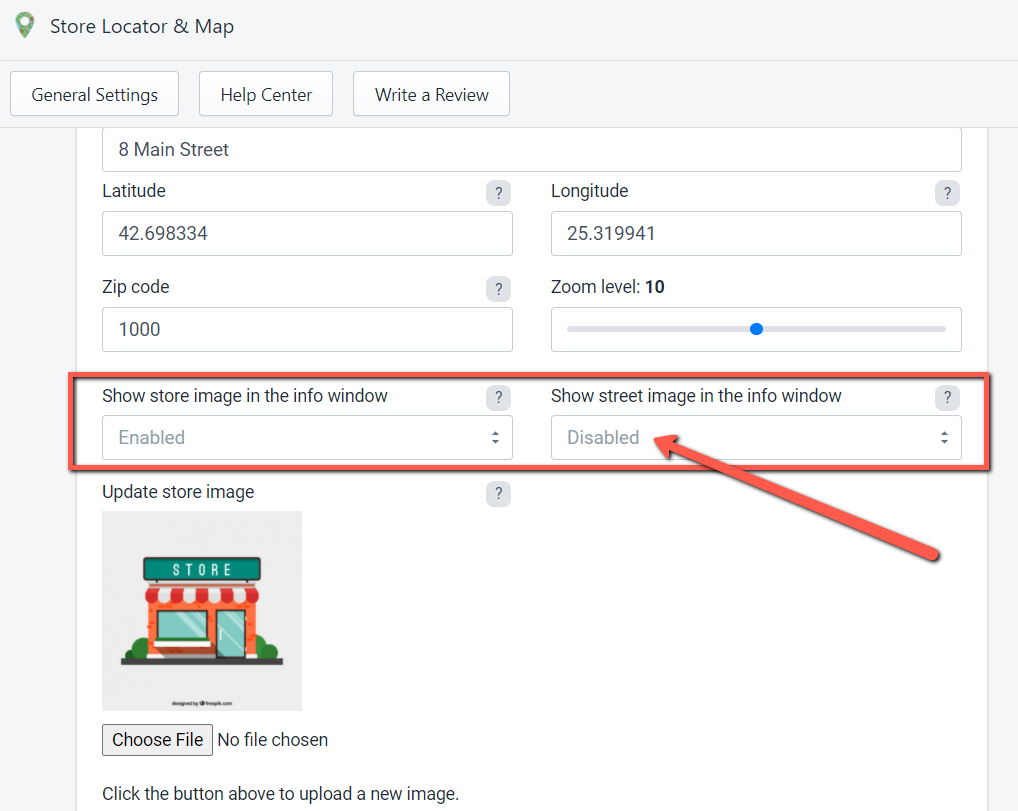
Otherwise, the Street view image will always show over the Uploaded store image. -
15. When will a charge occur after the Free Trial ends?Once the trial is over, the app charge is issued, then invoiced monthly with all the other app and subscription charges. Merchants can see the breakdown of app charges all under one bill - the Shopify invoice. More information about this you will be able to find here: https://help.shopify.com/en/manual/your-account/manage-billing/your-invoice/apps